Bootstrap 3 is a great framework for frontend web development. It provides a huge set of tools to speed up the process of developing a bespoke website. We don’t use Bootstrap 3 at Fifteen to develop our websites, but there are times when rapid prototyping and quick UI’s are greatly improved with a little input from Bootstrap 3.
The Issue
Just recently, I began the the development of a tool on a WordPress website to handle the upload of a CSV (comma separated values) file to an ACF Repeater field. In simple terms, I had a list of between 400 – 600 records that were provided to me in a CSV and need to be put into fields, which could not be easily achieved through the database. There other ways to do this, and there may be better ways to do this. However, I am going to talk about how I approached this issue and developed a solution.
My Answer
I built a PHP class that accepted the CSV, broke it down into a PHP Array and looped through the ACF Repeater field and updated as necessary. Each field contained a unique PIN that I could define to distinguish records from each other. This was just the first step in the issue, the whole thing was built with as little HTML as was required and just did the bare minimum.
I started receiving different CSV’s that needed to go into the system and realised this tool was going to rapidly expand. It suddenly became apparent this tool was going to be super handy and there were a lot of requirements for it. It had to be:
- Easy to pick up and understand
- Accessible to different developers
- Feedback what the class has done
Thinking about these goals, and that my priority was a working tool over design, Bootstrap 3 was the perfect candidate to squash most issues I was running into.
How Bootstrap 3 saved the day
Bootstrap 3 has excellent documentation that is very clear and easy to use, and although I had not used Bootstrap 3 for roughly 2 years, looking at the CSS and standards, I quickly got going again.
My basic tool was completed but looked awful:
Before uploading a CSV:
![]()
After uploading a CSV:
![]()
Yes, an input with a label, it doesn’t get much more basic than that but that was all that was required. Then after the upload was completed it would display ‘CSV Upload Completed’. I uploaded a few tests, and took note of my issues which looked like this:
‘CSV Upload completed’ is not enough feedback, what happened?
It’s accurate and does what it says on the tin, but I want to know what happened to my CSV and the records on the website. I decided I needed to know:
- How many records existed prior to the upload?
- How many records were updated (based on finding the pin already existed)?
- How many records were created (because no pin existed)?
Are there any options when I upload the CSV?
This was a concern I had, but after further development with the PHP class, I was able to target the fields I needed and ignore the rest, so nothing more than a CSV upload was needed.
Can I get any info about the system’s records before I try to upload the CSV?
The purpose of the system was to fill in the blanks of data, for example, one CSV may contain the pin and a user’s name, another CSV might include the pin and address. The system would collate these into one, complete dataset. This leads to my final issue with what I had developed, I didn’t know what was missing or incomplete without trawling through the data, line-by-line.
The Final Product
With Bootstrap 3, this was my solution (please note this is a prototype built in JSbin, not the real deal) :
Before uploading a CSV:
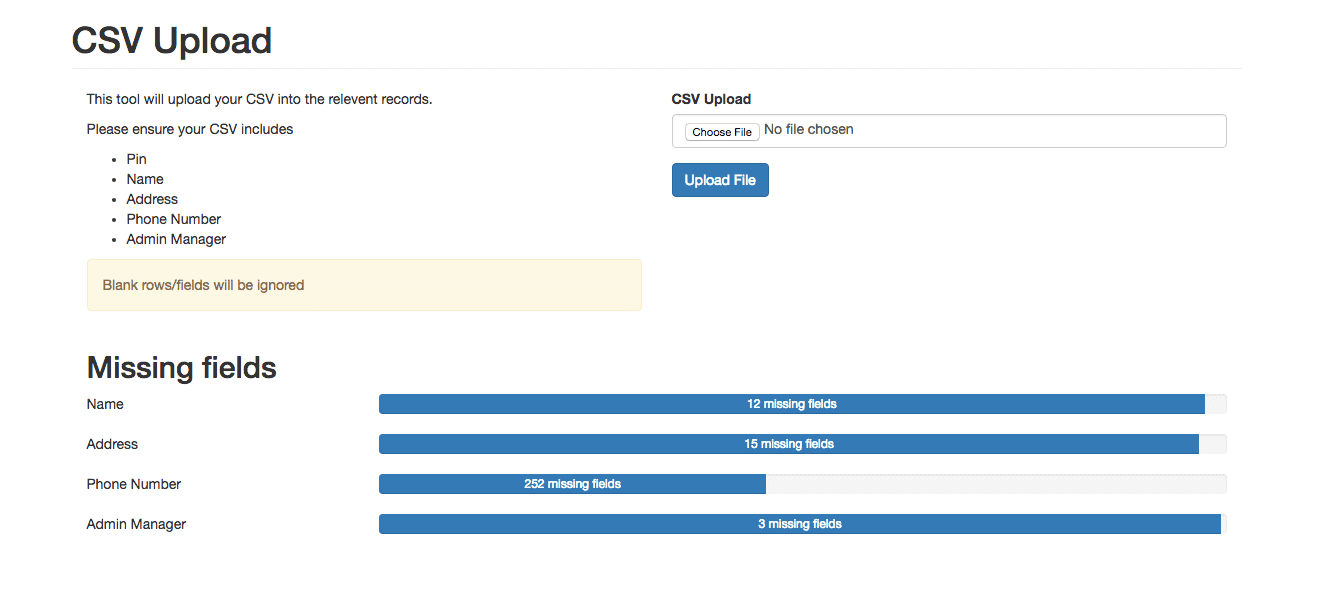
This is the first screen you get and straight away you can tell what page you are on, the important information regarding a CSV, where to upload a CSV and any missing fields that need updating.
Within the missing fields, are progress bars that display how completed the fields are within all the records. As you can see 252 records have phone number missing and require attention.
And responsive:
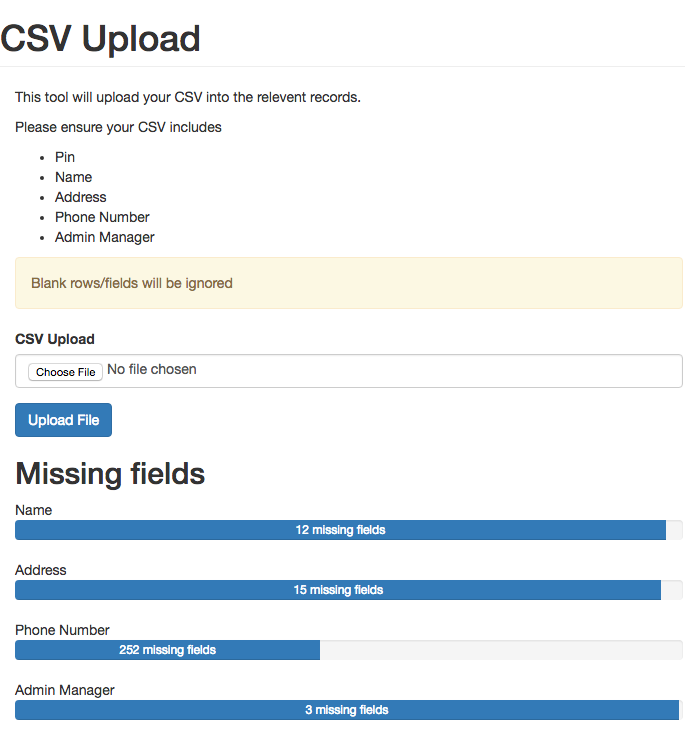
Most of the time I am working with this tool, it is compressed and put to the edge of the screen so I have a better view of the CSV I am cleaning before uploading. Adding in responsive columns at different breakpoints means i still get a clear view of the important information. If it was required, I could drill it down to be optimised for a wider variety of breakpoints.
On success of uploading a CSV:
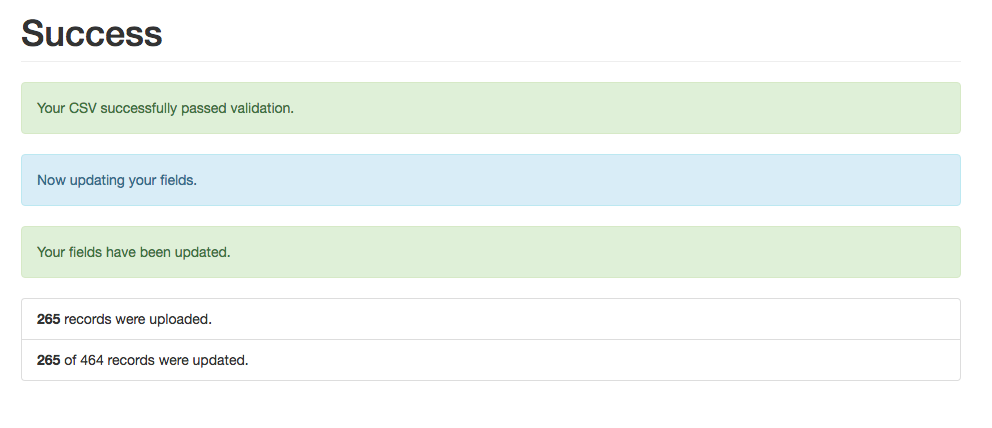
The upload process is broken into two steps, validation and processing. Validation just runs through the imported data and verifies it contains relevant information in the correct format, and if it passes the tests a message is provided.
Processing takes place after validation is successful, as detailed on this screen. This is where the fields are actually updated and this can take quite a while.
On error:
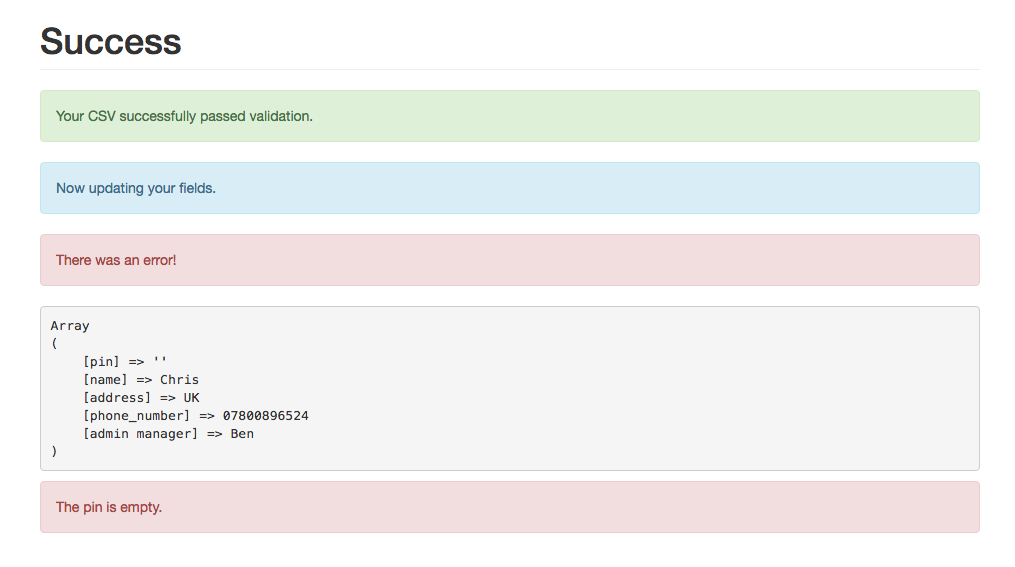
This error tells the user that the CSV passed the validation phase but failed on uploading because a Pin was not defined. In the following update after this I added the row number so I could find at what row the upload failed.
It was only after uploading the test I noticed that a record without a defined Pin passed validation and only errored during the upload. This prompted me to remove this test from the processing phase and into the validation phase so that any errors from the information being uploaded could be captured prior to even attempting to update ACF fields.
Final thoughts
It might be a little hard to understand just looking at these images, but these are the screens that appear in my tool and should be helpful to any future developers that want to upload a CSV. Any more suggestions would be much appreciated and I would love to hear how other people might approach this. Or if you can, provide me an example via https://jsbin.com/ and add the Bootstrap 3 library.